
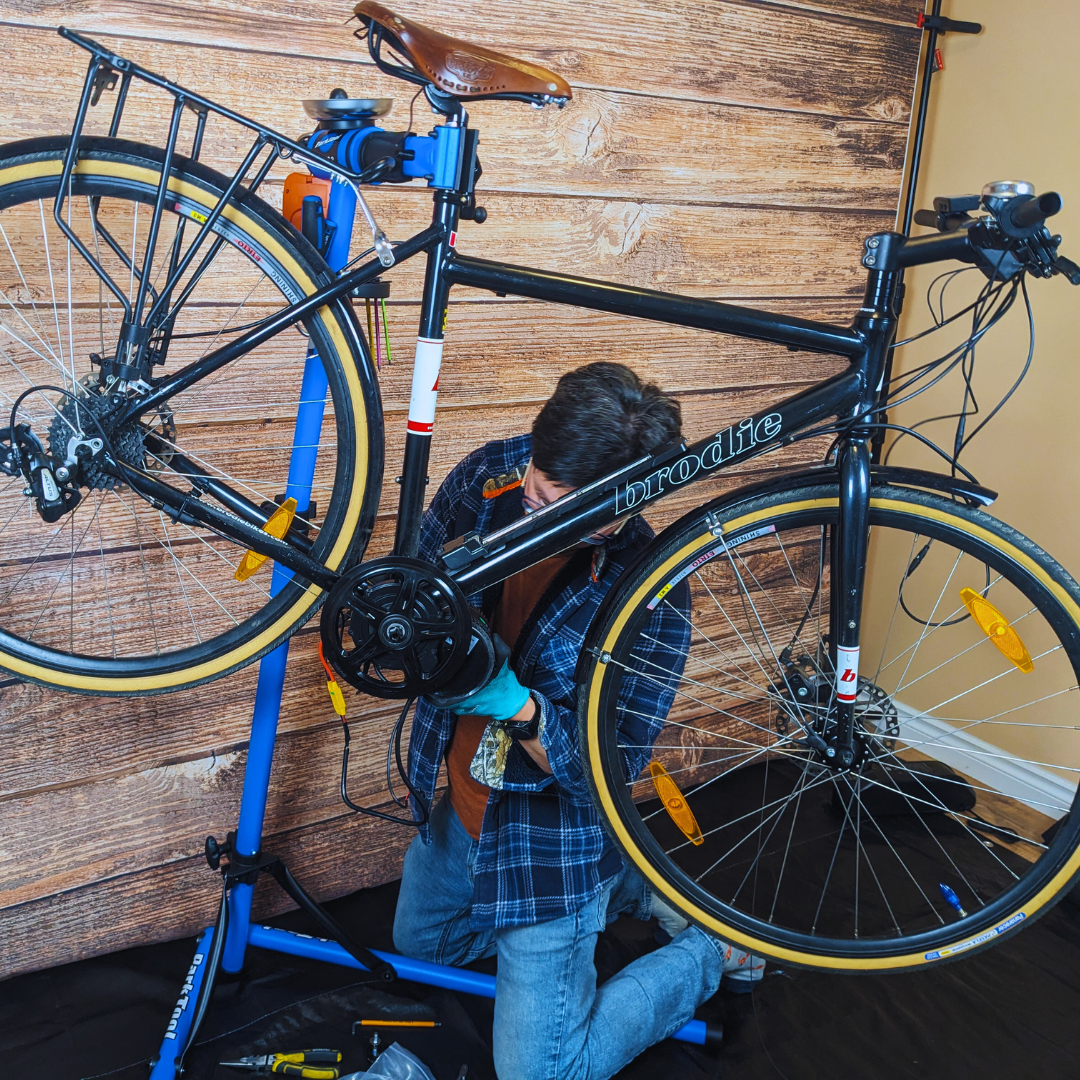
Transforming your existing bike into an electric bike with a Bafang BBS02 mid-drive motor is an exciting prospect. It offers the thrill of e-bike performance with the familiarity of the bike you know and love. However, before diving into the conversion process, it's essential to determine if your bike is a suitable candidate. Compatibility with the Bafang BBS02 conversion kit depends on several key factors. Therefore, before purchasing the kit, it's crucial to thoroughly assess your bike to ensure compatibility and identify any potential issues. Here's what you need to check:
Motor Placement
Bottom Bracket

Firstly, the bottom bracket shell is where the Bafang BBS02 mid-drive motor is mounted. This motor is designed to fit bikes with standard JIS-BSA bottom brackets, also known as English or British, standard threaded, square tapered, or sealed cartridge.
 |
 |
| Secondly, the BBS02 is compatible with bottom bracket widths of 68-73mm. Measure the width of your bike’s bottom bracket shell with a caliper or ruler. | Additionally, the BBS02 requires a bottom bracket with an internal diameter of 34-36mm. Measure the internal diameter with a caliper or ruler. |
If your bottom bracket does not meet these measurements, the installation cannot be done without additional measures, such as using an adapter or a different motor. Consequently, contact us and we can offer further guidance.
Frame Clearance
Ensuring proper frame clearance is crucial for the successful installation of the Bafang BBS02 motor. Here are the two main things to check:
Frame Thickness and Obstructions Under the Bottom Bracket
To ensure the Bafang BBS02 motor fits properly, you need to measure the thickness of the bottom bracket shell plus any obstructions like a cable guide. Follow these steps:
Firstly, measure the Bottom Bracket Shell: Use a caliper or ruler to measure the thickness of the bottom bracket shell itself.
Secondly, measure Any Obstructions: Measure the thickness of any obstructions under the bottom bracket shell, such as cable guides.
Lastly, Total Thickness: Add the thickness of the bottom bracket shell and any obstructions. The total thickness should not exceed 12mm.

If the total thickness is more than 12mm, the motor will not fit. Additional measures will need to be taken. For example, if the cable guide is too thick, you can file it down, replace it with a shorter one, or remove it entirely.
By ensuring the total thickness does not exceed 12mm, you can avoid fitment issues and ensure a smooth installation process.
Chain-ring Clearance
Multi-Speed Front Derailleur: If your bike had a 2 or 3-speed front derailleur, there should be enough clearance for the 44-tooth chainring that comes with the BBS02.
1x Setup and Wide Tire Clearance: For bikes with a 1x setup (common on modern mountain bikes produced after 2012) and/or tire clearance greater than 2 inches, you might need a smaller chainring, like a 36-tooth, or use spacers to fit the motor properly.
 |
| For instance, this Giant Talon with 2.4" tires and a 1x setup required a 36-tooth chainring as there was not enough clearance to fit the stock 44-tooth. |
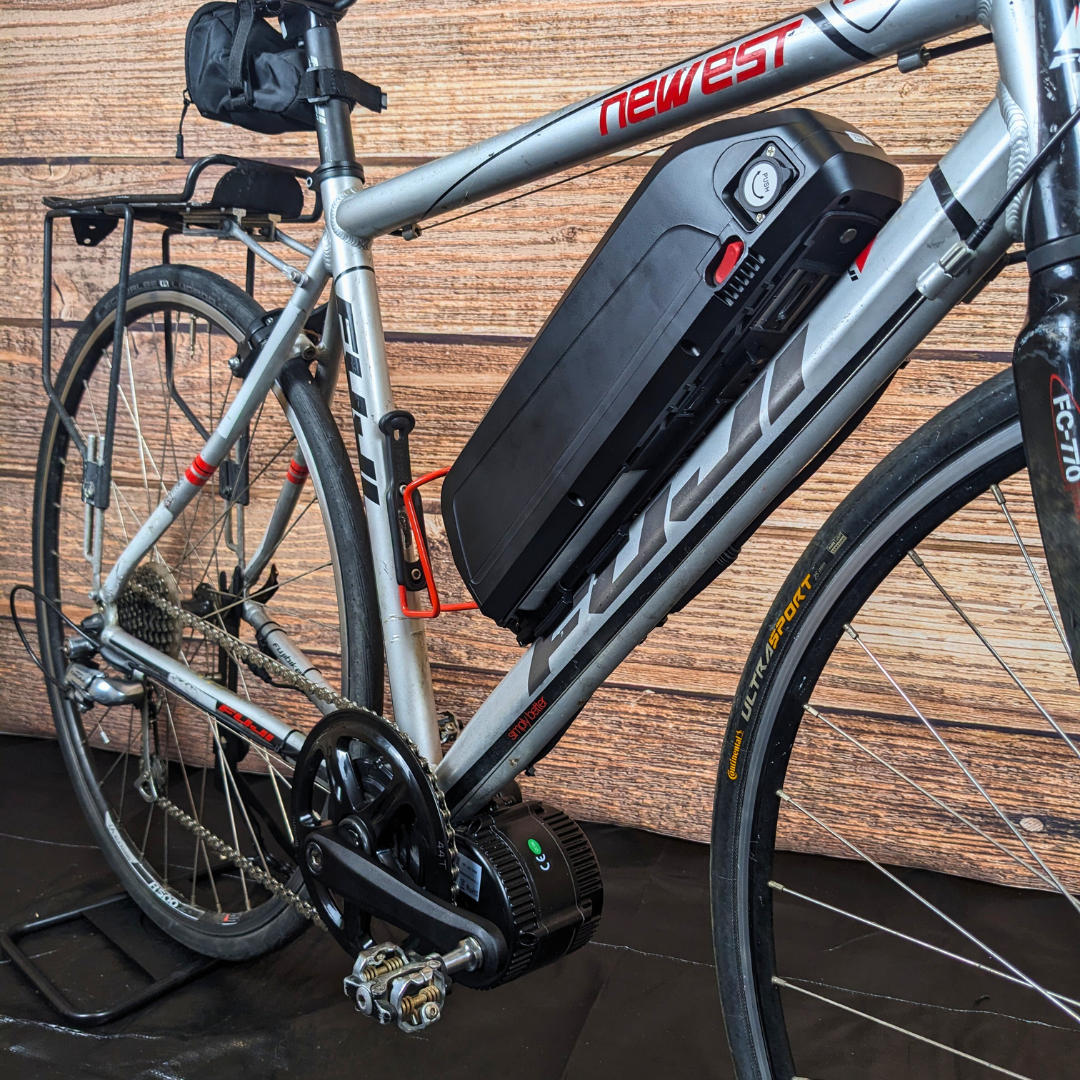
Battery Placement
Depending on the downtube battery size, it is recommended to add an extra one inch to each side when measuring whether it will fit inside your frame triangle. The extra inch is to account for the space required for the battery to slide in and out of the battery rail.
For example, a 48v 17.5Ah battery measures 14.4" in length and 4.33" in height. Take a piece of cardboard and cut out a rectangular shape measuring 15.4" x 5.33". Use that to see if it will fit inside the frame triangle, right where the water bottle cage would be.
Sometimes the battery rail holes will not line up well with the existing bottle cage eyelets on the frame. If this happens an additional battery anchor can be purchased which will provide a more mounting options. The battery anchor bolted directly onto the eyelets or use hose clamps to be mounted anywhere on the frame.
| Downtube Mounting: The most common location for mounting the battery is on the downtube, typically in the area where a water bottle cage would be mounted. Brackets are available for more flexibility in mounting the battery, allowing you to position it in the most suitable location on the downtube. |  |
|
| Rear Rack Mounting: Alternatively, you can mount the battery on a rear rack. Ensure your bike has a sturdy rear rack that can support the weight of the battery. A rear rack-mounted battery will make the bike feel heavier when you are not riding it. This is because all the weight is over one wheel. However, when riding, you often won't notice it's there unless you are riding at very slow speeds. |
|

Condition of Bike
Ensure your bike is in good working condition. Check that the frame is not cracked or damaged, and that all components are functioning properly. Inspect the chain and gears for wear and tear. It is recommended to replace any worn-out parts before proceeding with the installation. Moreover, check the brakes to ensure they are in good condition and functioning properly. If your bike uses hydraulic brakes, consider whether you want to install the optional brake sensors.
By thoroughly assessing your bike, you can identify and address any potential compatibility issues before starting the installation. Consequently, this will help ensure a smoother and more efficient installation process.
Leave a comment
All comments are moderated before being published.
This site is protected by hCaptcha and the hCaptcha Privacy Policy and Terms of Service apply.